实现方式
1
2
3
4
5
6
7
8
9
10
11
12
13
14
15
16
17
18
19
20
21
|
AlertDialog.Bulider bulider = new AlertDialog.Bulider(context);
Bulider.setIcon(int iconId);
Bulider.setTitle(CharSequence title);
Bulider.setMessage(CharSequence message);
Bulider.setView(View view);
Bulider.setPositiveButton(text,OnClickListener);
Bulider.setNegativeButton(text,OnClickListener);
Bulider.setNeutralButton(text,OnClickListener);
Bulider.create();
Bulider.show();
|
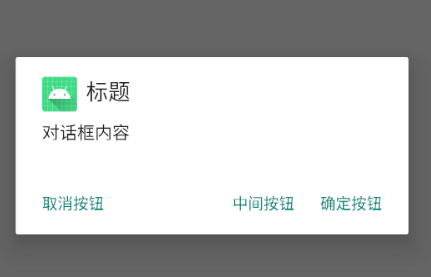
普通dialog
代码部分
1
2
3
4
5
6
7
8
9
10
11
12
13
14
15
16
17
18
19
20
21
22
23
24
25
26
27
28
| protected void MyClick(){
btn.setOnClickListener(new View.OnClickListener() {
@Override
public void onClick(View view) {
AlertDialog.Builder dialog = new AlertDialog.Builder(MainActivity.this);
dialog.setTitle("标题")
.setIcon(R.mipmap.ic_launcher)
.setMessage("对话框内容")
.setPositiveButton("确定按钮", new DialogInterface.OnClickListener() {
@Override
public void onClick(DialogInterface dialogInterface, int i) {
}
})
.setNegativeButton("中间按钮", new DialogInterface.OnClickListener() {
@Override
public void onClick(DialogInterface dialogInterface, int i) {
}
})
.setNeutralButton("取消按钮", new DialogInterface.OnClickListener() {
@Override
public void onClick(DialogInterface dialogInterface, int i) {
}
})
.create()
.show();
}
});
}
|
展示图
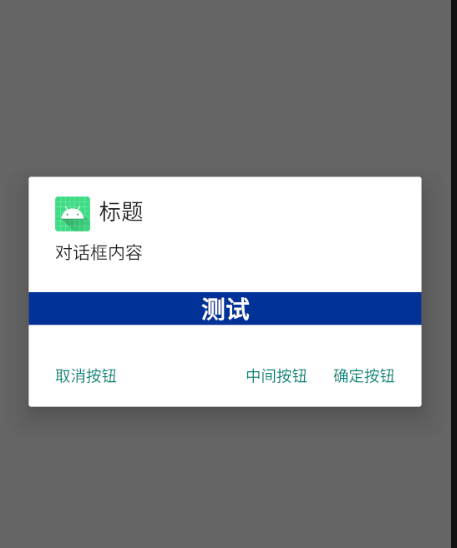
将页面作为dialog
先创建一个xml布局,命名为dialog
1
2
3
4
5
6
7
8
9
10
11
12
13
14
15
| <?xml version="1.0" encoding="utf-8"?>
<LinearLayout android:layout_height="match_parent"
android:layout_width="match_parent"
android:orientation="vertical"
android:gravity="center"
android:background="#ff023198"
xmlns:android="http://schemas.android.com/apk/res/android">
<TextView
android:layout_width="wrap_content"
android:text="测试"
android:textColor="#ffffffff"
android:textSize="22sp"
android:textStyle="bold"
android:layout_height="wrap_content"/>
</LinearLayout>
|
代码部分
1
2
3
4
5
6
7
8
9
10
11
12
13
14
15
16
17
18
19
20
21
22
23
24
25
26
27
28
29
30
31
32
| protected void MyClick(){
btn.setOnClickListener(new View.OnClickListener() {
@Override
public void onClick(View view) {
AlertDialog.Builder dialog = new AlertDialog.Builder(MainActivity.this);
dialog.setTitle("标题")
.setIcon(R.mipmap.ic_launcher)
.setMessage("对话框内容")
.setPositiveButton("确定按钮", new DialogInterface.OnClickListener() {
@Override
public void onClick(DialogInterface dialogInterface, int i) {
}
})
.setNegativeButton("中间按钮", new DialogInterface.OnClickListener() {
@Override
public void onClick(DialogInterface dialogInterface, int i) {
}
})
.setNeutralButton("取消按钮", new DialogInterface.OnClickListener() {
@Override
public void onClick(DialogInterface dialogInterface, int i) {
}
})
.setView(R.layout.dialog)
.create()
.show();
}
});
}
|
展示图
日期选择器
DatePickerDialog继承自AlertDialog
主要用于向用户提供包含年月日的日期数据并且允许用户对数据进行修改
它的监听器
1
| DatePickerDialog.OnDateSetListener();
|
弹出日期选择对话框组件
1
2
3
4
5
6
7
8
9
10
11
12
13
14
15
|
Calendar calendar = Calendar.getInstance();
DatePickerDialog datePickerDialog = new DatePickerDialog(
HomeActivity1.this,
new DatePickerDialog.OnDateSetListener() {
@Override
public void onDateSet(DatePicker view, int year, int month, int dayOfMonth) {
Toast.makeText(HomeActivity1.this,year + "-" + (month + 1) + "-" + dayOfMonth,Toast.LENGTH_SHORT).show();
}
},
calendar.get(Calendar.YEAR),
calendar.get(Calendar.MONDAY),
calendar.get(Calendar.DAY_OF_MONTH));
datePickerDialog.show();
|